Deploy configuration via Wireless Upload with BALTECH Uploader
For this deployment method, connect a transfer reader to a laptop and upload the configuration via the transfer reader to the target reader over NFC.
Equipment & requirements
- Deployable configuration file, exported in BEC2 format
-
Transfer reader:
- For access control and embedded or desktop applications:
ID-engine Z BRICK or, HF or Multi variants (10115-xxx-xx) - For print management:
Micro Card Reader SET, HF or Multi variants (10115-xxx-xx)
Readers with following article numbers will not work as transfer readers
- 10089-xxx-xx
- 10090-xxx-xx
- 10094-xxx-xx
- 10099-xxx-xx
- 10117-xxx-xx
- 12117-xxx-xx
- For access control and embedded or desktop applications:
-
Target readers with the following firmware:
- 1100 v2.00 / 1096 v3.00 or above
- Custom firmware originally created as of November 2021
Perform Wireless Upload
- Connect the transfer reader to the laptop.
-
Open the latest version of BALTECH Uploader.
Download it here as part of BALTECH ToolSuite. -
Click Browse... in the top right and select the BEC2 file to deploy.
Alternatively, click the dropdown to select one of 5 recently used files. -
Click Start Wireless Upload.
Starting Wireless Upload will trigger a tamper alarm. During the upload, the communication with the host will be interrupted.

-
The transfer reader now starts searching for a target reader.

-
Position the transfer reader on top of the target reader and align antenna centers (i.e. card symbols on front stickers). Tolerance is 10 mm max. in each direction.
-
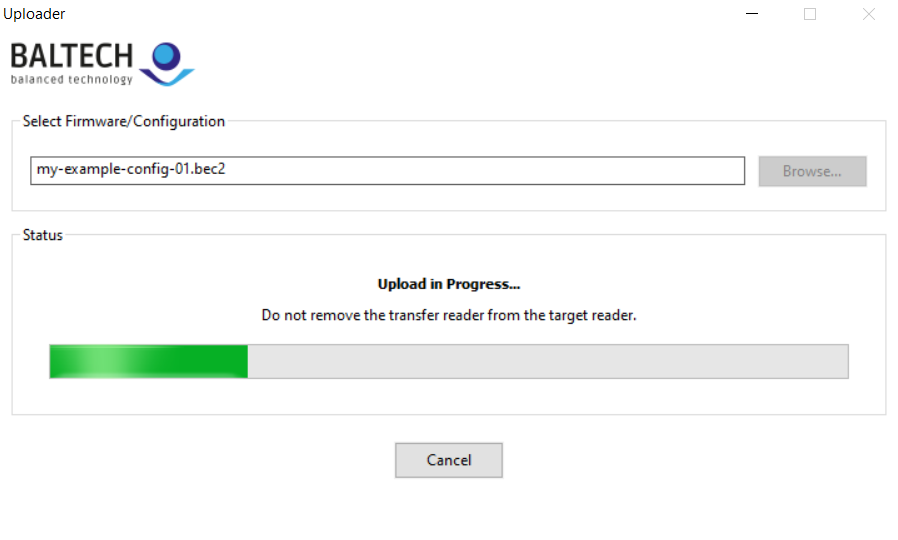
Once the target reader has been detected, the upload starts automatically.
-
When the upload is completed, remove the transfer reader from the target reader and confirm the info message on the screen. The transfer reader then starts searching for the next target reader.
Automate this process
To automate deployment, you can invoke Uploader from your own application or script.
LED and beeper signaling during upload
Error prevention & troubleshooting
Avoid interruptions
If the file to upload includes a packaged firmware, the process takes approximately 1 minute to several minutes, depending on the firmware versions you're updating from and to. To avoid interruptions, keep the readers as close as possible to each other and their antenna centers aligned until the target reader's LED turns green.
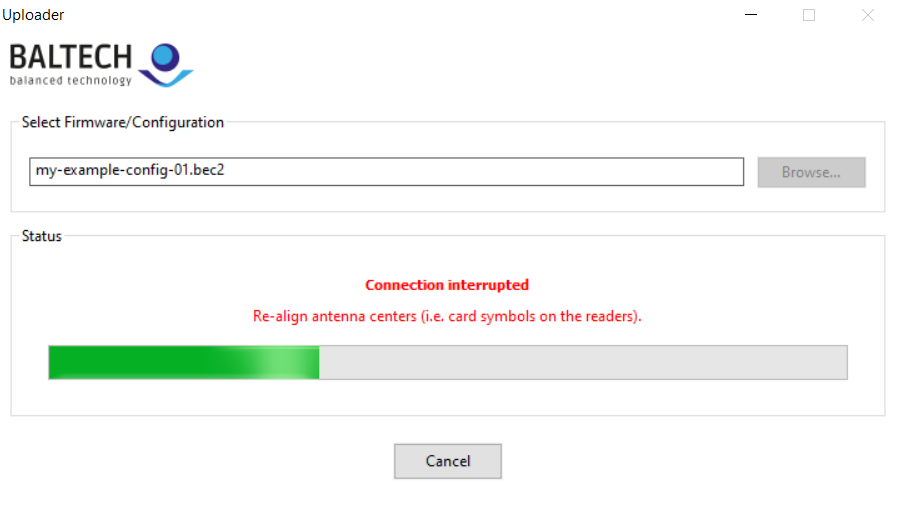
Resume an interrupted upload
An interrupted upload is indicated by LED and beeper as shown in the diagram above. Besides, you'll see the following message in Uploader. To resume the upload, reposition the transfer reader on the target reader within 15 seconds.
Repeat an aborted upload
If an upload is permenantly aborted, e.g. due to a power outage, we highly recommend you repeat the upload, even if the reader reboots normally. This is to ensure the new firmware has been loaded completely and is fully functional.
Repeating the upload is mandatory if the target reader displays one of the following LED patterns after reboot:
-
Yellow LED, followed by red flashes
-
Red flashes
For more details, please see this troubleshooting entry.
Other errors
-
If the target or transfer reader's LED turns red, please see the corresponding error message on the screen. For many errors, you can find more information in our troubleshooting guide.
-
If the reader doesn't respond at all, please see this troubleshooting entry.
Integration in ACCESS200 installation workflow
To see how config deployment fits into the full installation workflow for ACCESS200, please refer to the full installation guide.