Add Mobile ID users
People you add as users can use the Mobile ID app on their phones to interact with card readers, e.g. to open doors. You can add users one by one, or in bulk by importing their data from a CSV file.
For projects with many users and frequent data changes, you may want to set up Auto-sync instead.
If you as an admin want to use the Mobile ID app as well, you need to add yourself as a user.
Add users one by one
- Log in to your admin account in Mobile ID Manager.
-
If you have multiple projects, make sure the desired one is open.
How do I switch projects?
Click the arrow next to the project name at the top.

-
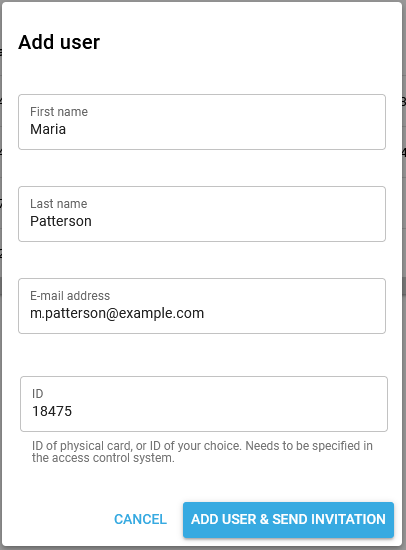
In the Users section, click Add user.
-
Enter the user's data.
-
Click Add User & Send Invitation.
Add and update users in bulk via CSV import
When you import a CSV file, the user list in Mobile ID Manager will be synchronized with the CSV file. Other than adding users one by one, this sync is not additive, but will replace all existing user entries. This means:
- New users are added and invited.
- Existing users whose data has changed will be updated.
- Existing users not included in the CSV file will be deleted and will be notified via e-mail.
- Users with status Reset will remain unchanged.
To add and update users via CSV import:
-
Prepare a CSV file with the required data of the users you want to add. The CSV file needs to contain the following columns in the given order:
- First name
- Last name
- E-mail address
-
ID
Here's an example CSV file:

-
Log in to your admin account in Mobile ID Manager.
-
If you have multiple projects, make sure the desired one is open.
How do I switch projects?
Click the arrow next to the project name at the top.
-
In the Users section, click Import CSV.
- Upload the CSV file. To do so, drag it into the dotted area, or click browse to navigate to the file's location.
-
Click Import. The user list is updated, i.e. it is completely replaced by the CSV file content.
If import fails due to errors in the CSV file, you'll see a message with the errors detected. Here's an example:

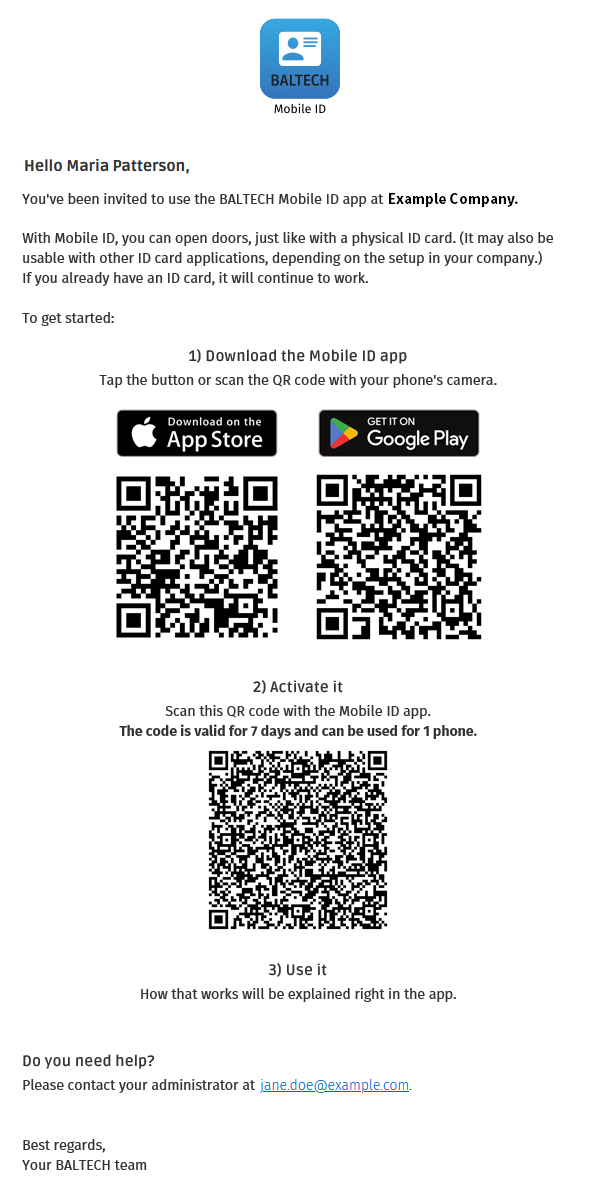
What happens when a new user is added?
A new user is added with status Invitation sent.

They receive an invitation e-mail with instructions to download and activate the Mobile ID app. The invation works for 1 phone and is valid for 7 days. Once the user has activated the app, their status will switch to Active (learn more about statuses).
The invitation e-mail looks like this: